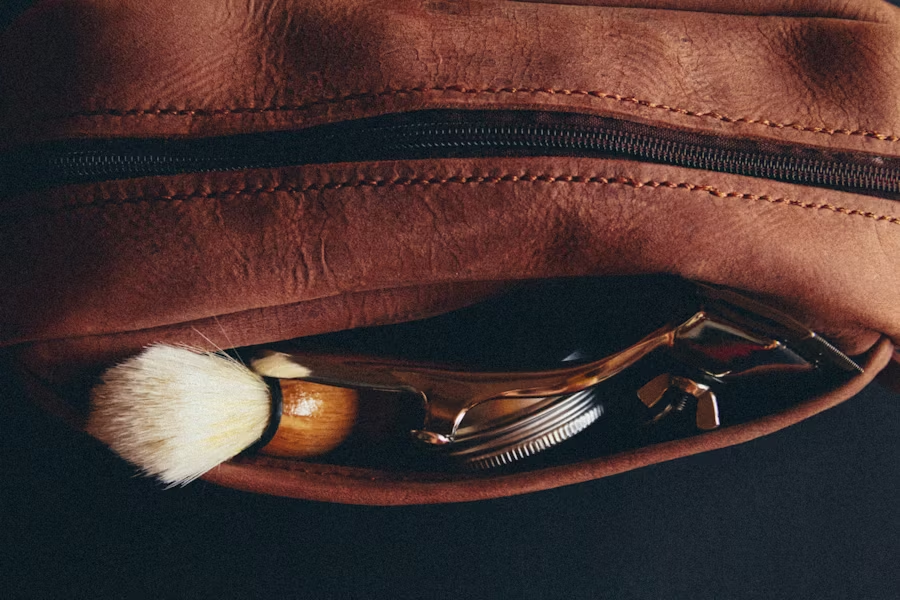
El cuero es un material atemporal conocido por su durabilidad y elegancia., comúnmente utilizado en muebles, ropa, accesorios, interiores de automóviles, y bolsas de viaje. Sin embargo, el cuero es susceptible a rayones, desgastes, y desvaneciéndose con el tiempo a pesar de su resiliencia.
Estas imperfecciones pueden restar valor a tus artículos de cuero.’ atractivo estético y longevidad. Comprender la naturaleza de estos daños y cómo abordarlos es crucial para mantener la belleza y funcionalidad de sus productos de cuero..
En esta guía completa, exploraremos:
- Los diferentes tipos de rayones en el cuero y cómo identificarlos
- Métodos detallados paso a paso para reparar diversos grados de rayones
- Técnicas para devolver el color al cuero descolorido o dañado
- Estrategias efectivas para hidratar y mantener el cuero.
- Medidas preventivas para proteger el cuero de daños futuros
Al final de este artículo, Estará equipado con el conocimiento y las herramientas necesarios para mantener sus artículos de cuero impecables y extender su vida útil..
Tipos de rayones en el cuero
Antes de emprender cualquier proceso de reparación, Es esencial identificar con precisión el tipo y la extensión del rasguño.. Esta evaluación determinará el método de reparación adecuado y garantizará el mejor resultado posible..
Arañazos superficiales ligeros
- Apariencia
Marcas superficiales que afectan sólo la capa superior del cuero..
- Causas
Abrasiones menores de las uñas., llaves, o contacto incidental con superficies rugosas.
- Impacto
Principalmente cosmética, a menudo visible sólo bajo ciertas condiciones de iluminación.
- Identificación
Pase suavemente el dedo por el rasguño.. Si se siente suave y no atrapa tu uña, es probable que sea un ligero rasguño en la superficie.
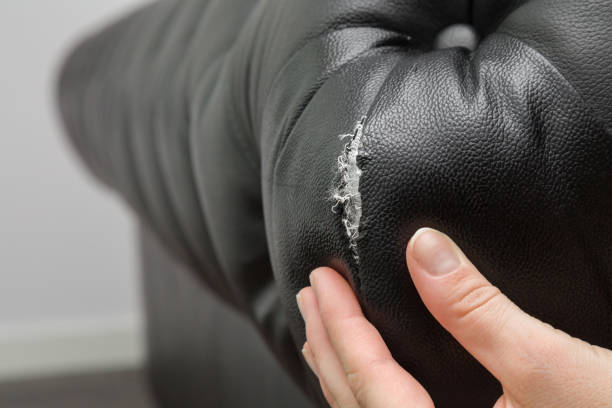
Arañazos y cortes profundos
- Apariencia
Líneas pronunciadas o cortes que penetran más profundamente en las capas de cuero..
- Causas
Contacto con objetos punzantes, garras de mascota, o impacto significativo.
- Impacto
Más notorio y puede exponer el material subyacente., afectando tanto la apariencia como la integridad estructural.
- Identificación
Estos rasguños se sienten y se ven fácilmente., A menudo va acompañado de un cambio en la textura o el color.. El rasguño puede sentirse áspero o tener bordes deshilachados..
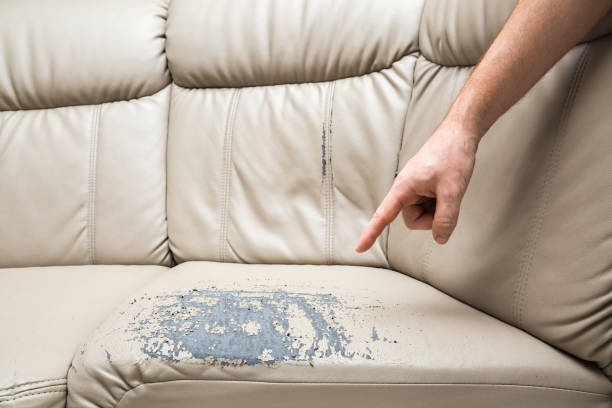
Desgastes y áreas desgastadas
- Apariencia
Zonas donde el cuero parece opaco, aplanado, o descolorido.
- Causas
Fricción por uso regular, puntos de presión, o frotamiento constante contra otras superficies..
- Impacto
Esto puede provocar un adelgazamiento del cuero y una mayor susceptibilidad a sufrir daños mayores..
- Identificación
Las áreas raspadas pueden carecer del brillo del cuero circundante y sentirse más suaves o desgastadas.. Son comunes en áreas de alto contacto como los apoyabrazos., cojines de asiento, y dedos de los zapatos.
La identificación precisa del tipo de arañazo es el primer paso hacia una reparación eficaz. Identificar erróneamente el daño puede llevar a un tratamiento inadecuado, potencialmente empeorando el problema.
¿Cómo puedo quitar los rayones del cuero??
La reparación de rayones en el cuero requiere un enfoque metódico adaptado a la gravedad del daño.. A continuación se detallan los pasos para abordar rayones leves y profundos..
Eliminación de rayones leves en la superficie
Los rayones superficiales leves son superficiales y, a menudo, se pueden remediar con técnicas simples y materiales fácilmente disponibles..
- Materiales necesarios
Paño de microfibra
Limpiador de cuero
Acondicionador de cuero
Opcional: Secador de pelo
- Limpiar el área afectada
Comience limpiando el área rayada para eliminar la suciedad., aceites, o residuos que puedan interferir con el proceso de reparación.. Utilice un limpiador de cuero aplicado sobre un paño de microfibra., limpiando suavemente el área con movimientos circulares. Esto asegura que la superficie esté preparada para el tratamiento..
- Pulir el rasguño
Después de la limpieza, usar un seco cuero de microfibra paño para pulir suavemente el rasguño con movimientos circulares. Esta acción puede ayudar a redistribuir los aceites naturales del cuero., reduciendo potencialmente la visibilidad del rasguño. Sea amable para evitar causar daños adicionales..
- Acondicionar el cuero
Una vez que el rasguño ha sido pulido y tratado, aplique un acondicionador de cuero de alta calidad en el área. Esto restaura la humedad y la flexibilidad del cuero., ayudando a mezclar el rasguño con el material circundante. Aplicar el acondicionador utilizando un paño de microfibra, siguiendo las instrucciones del producto, y permita que se absorba completamente antes de usar el artículo..
Reparación de rasguños y cortes profundos
Los rayones profundos penetran más allá de la capa superficial del cuero y requieren métodos de reparación más intensivos para restaurar tanto la apariencia como la integridad..
- Materiales necesarios
Masilla para cuero o compuesto reparador
Una espátula o espátula
Papel de lija de grano fino (600 arena)
Tinte para cuero a juego con el color del artículo.
Acondicionador de cuero
Acabado o sellador de cuero
- Limpiar el área
Limpie a fondo el área rayada con un limpiador de cuero para eliminar cualquier contaminante.. Esto asegura que el relleno se adhiera correctamente y que ningún residuo interfiera con la reparación.. Deje que el área se seque completamente antes de continuar..
- Aplicar masilla para cuero
Usando una espátula o una espátula, aplique una pequeña cantidad de masilla para cuero al rasguño o corte. Distribuirlo uniformemente, asegurando que llene el área dañada sin exceso de acumulación. Trabajar en capas finas, permitiendo que cada capa se seque antes de aplicar la siguiente. Este proceso puede tardar algún tiempo., pero asegura un acabado suave y natural..
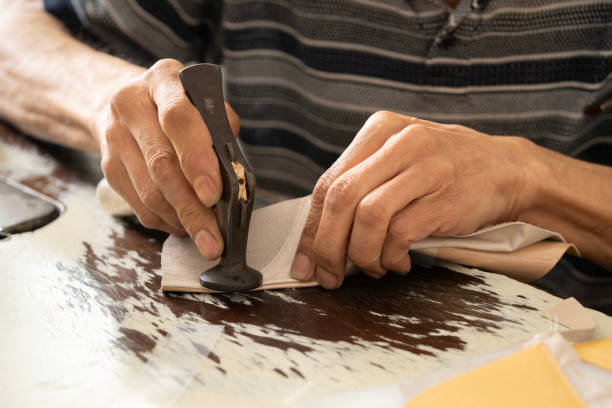
- Lije el área rellena
Una vez que el relleno se haya secado por completo., utilizar papel de lija de grano fino (600 arena) lijar suavemente el área. Este paso suaviza los bordes ásperos y garantiza que el relleno se mezcle perfectamente con el cuero circundante.. Tenga cuidado de no lijar demasiado, ya que esto puede eliminar demasiado relleno y exponer el rasguño nuevamente.
¿Cómo se restaura el color del cuero??
Con el tiempo, El cuero puede perder su color debido a la exposición a la luz solar., tener puesto, y cuidado inadecuado. Restaurar su color original mejora tanto su apariencia como su durabilidad..
Usar bálsamo para teñir cuero
El bálsamo para teñir el cuero es una forma rápida y eficaz de restaurar las zonas descoloridas..
- Limpiar bien el cuero para eliminar la suciedad y los aceites..
- Aplicar el bálsamo con un paño suave o una esponja., trabajando en movimientos circulares.
- Déjalo reposar unos minutos para que se absorba..
- Pula el área con un paño limpio para lograr un tono uniforme..
Uso de tinte para cuero para restauración permanente
El tinte para cuero ofrece una opción de restauración del color duradera.
- Elija un tinte que se asemeje mucho al color del cuero original..
- Aplicarlo en capas finas con una esponja o brocha..
- Deje que se seque entre capas para un acabado consistente..
- Sella el color con un acabado de cuero para evitar la decoloración..
Conclusión
El cuero es una inversión., y el cuidado adecuado garantiza que dure años. Ya sea que se trate de arañazos, desgastes, o color descolorido, Conocer las técnicas de reparación adecuadas marca una diferencia significativa.
Como fabricante mayorista de bolsos de viaje de cuero, SIN VOTO Nos gustaría brindar un servicio personalizado y servicios normales para todas las empresas de bolsos de viaje de cuero.. Garantizamos estándares de servicio incomparables, centrándose en la precisión, calidad de primer nivel, y cronogramas de producción eficientes para una satisfacción superior del cliente.
para resumir: Siguiendo estos pasos, Puedes mantener la belleza de tus artículos de cuero y protegerlos de futuros daños..
- Rayones ligeros se puede pulir con calor, acondicionador, o aceites naturales.
- Arañazos profundos requiere relleno, teñir, y sellador para una restauración adecuada.
- Recoloración del cuero Se puede lograr con bálsamo o tinte para restaurar las áreas descoloridas..
- Hidratación regular previene el agrietamiento y prolonga la vida útil del cuero..
- Medidas preventivas tales como revestimientos protectores y un almacenamiento cuidadoso mantienen el cuero como nuevo.
Preguntas frecuentes
Cómo evitar que el cuero se raye
Evite los objetos afilados: Mantenga el cuero alejado de las llaves, cremalleras, o superficies rugosas para evitar rayones.
Utilice una capa protectora: Los protectores de cuero crean una barrera para reducir el desgaste diario..
Almacenar correctamente: Mantenga los bolsos y muebles de cuero alejados de la fricción excesiva o de las garras de las mascotas..
Condición regularmente: Aplicar acondicionador de cuero para mantenerlo suave., durable, y resistente a los rayones.
¿Qué puedo utilizar para hidratar el cuero??
- Acondicionador de cuero
- Aceites Naturales (Coco, Aceituna, o aceite de visón
- Cremas para cuero a base de cera de abejas
- Hidratantes comerciales para cueroZ
Cómo quitar las marcas de los zapatos?
- Pulir con un paño suave
- Utilice un limpiador de cuero
- Pruebe con un borrador blanco para rayones leves
- Aplicar una pequeña cantidad de vaselina